RECIPE: Empire Cookies

Being home (almost) every day during the summer is hard when you’re used to constantly being on the go. So today I decided to do some home baking. Empire cookies have always been one of my favourites, so I thought that today would be a perfect day to make my own (for the first time, bear with me!). They’re a classic British favourite, and as I am (greatly) missing the UK, I thought I would indulge myself. I looked through some great recipes online, but I ended up using hiddenponies‘ recipe.

My cute little empire cookies!

I topped most of mine using cherry red dragees, but I sprinkled some toasted almond on others.

Ingredients:

  • ½ cup butter, softened
  • ½ cup sugar
  • 1 egg
  • 1 tsp almond extract
  • 2 cups flour
  • 1 tsp baking powder
  • ½ cup raspberry jam (lightly whipped)

Icing

  • ¾ cup icing sugar
  • ¼ tsp almond extract
  • 1 tbsp hot water (plus extra)

Method

  1. Preheat oven to 350°. Line 2 baking sheets with parchment paper and set aside.
  2. In mixer with paddle attachment, beat butter and sugar until fluffy. Then, beat in the egg and almond extract. Add half the flour and baking powder; stir. Add the remaining dry ingredients and mix until you get a smooth dough. Dough will be slightly stiff.
  3. On a floured surface, roll dough to ⅛” thickness. Using a 1.5” round cookie cutter (with scalloped edges, if available) cut out shapes. Rework the dough as little as possible. Cookies can be placed very close together on baking sheet, as they do not expand when baking.
  4. Bake cookies for approximately 10 minutes, or until slightly stiff. Cool completely on wire racks before frosting.
  5. Combine water, icing sugar and almond extract in small bowl. Pipe a circle on the top of half of the cookies using the relatively thick frosting. Once complete, add more water to the mixture to loosen. Using a tapered spatula, spread thinned frosting inside circle. Decorate as desired.
  6. Spread ½ tsp raspberry jam onto the bottoms of your unfrosted cookies. Match up with frosted tops and create little sandwiches.
  7. Allow for 3 hours to set before packing.

Variations: use vanilla or coconut extract instead of almond; top with red dragees, toasted sliced almonds, granulated sugar, candied cherry, etc.

What if?

20140513-213153.jpg

Over the past month or so, I’ve read the Harry Potter series for the first time, at 20 years old. I never had any of the books, and neither did my brother, so I went without reading it up until now. I saw that my cousin had them on her bookshelf, so I borrowed them…and never want to give them back. I loved them. There is so much humour, so much love put into these stories.

And I know, everything nowadays is a franchise. Books, movies, merchandise, all in it just to make money. But I don’t care. I will own this series for my children to read. I will buy all the DVDs to add to my collection when I get home. And yes, when we went to London, we went to Platform 9 3/4.

I love that there is this timeless story for children to read for generations. It’s so full of wonder and the impossible. You want it to be real. Every child who read this series waited anxiously for their 11th birthday, so they could get their letter in the mail. They dreamt of Hogwarts and spent so long just wishing it was real. And then cold reality set in and they realized it wasn’t. But I think that a part of them still held on. A part of me did. I’m 20 years old, with an education and a job and a healthy sense of responsibility…but part of me just wonders, what if? Wouldn’t it be amazing if this world existed? If there was this whole other universe living right under our noses. I know that J.K. Rowling thought up the whole thing, but what if?

This series has grasped me within its claws, and will not let go. Will it ever let go? Not for me. I will always love this series, and will read it over and over again with my children. I know that it can sometimes be seen as a money maker (just like with many other franchises of this type), but I honestly believe that there’s something so true and incredible about this series. I think Rowling summed it up quite nicely…

No story lives unless someone wants to listen. The stories we love best do live in us forever. So whether you come back by page or by the big screen, Hogwarts will always be there to welcome you home.

RECIPE: Banana Peanut Butter Cheesecake

YUM!

YUM!

Nobody likes over-ripe bananas. So why not use them for a delicious recipe? I usually make banana muffins for breakfasts, but this time I decided to try something new. I found this great recipe online for just this situation – it combines some of my favourite things – peanut butter, bananas, cream cheese, sugar, and unhealthiness. Sounds like a win, right? And this recipe is great, because it’s completely no-bake – just throw it in the freezer until solid. And don’t worry if you don’t have an electric mixer, each component is easy enough to whip with a fork or whisk that you won’t really need it!

Ingredients:

  • 3 small ripe bananas, mashed
  • 100g of melted butter
  • 20 digestive biscuits (I use chocolate coated ones for extra deliciousness)
  • 140mL double cream
  • 140g icing sugar
  • 400g cream cheese
  • 1/2 tsp vanilla extract
  • 240g crunchy or smooth peanut butter

Method:

  1. Place your digestive biscuits in a sealed plastic bag and crush cookies using a rolling pin or sturdy jar (I used the peanut butter tub). Stir in your melted butter until all cookie crumbs are coated. Then, press this mixture into the bottom of an 8 or 9 inch spring form pan. Put parchment below base for ease of removal.

    You can use different shaped bases to achieve different shaped pieces. Use a round tin for a classic wedge, or a square for square pieces.

    You can use different shaped bases to achieve different shaped pieces. Use a round tin for a classic wedge, or a square for square pieces. I used this freezer-safe Tupperware to make my rectangular pieces.

  2. In a large mixing bowl, whip peanut butter until fluffy (or just until loosened).
  3. In a separate bowl*, whip cream cheese, sugar and vanilla until completely combined. Fold this mixture into the loosened peanut butter.
  4. In a separate bowl, whip the cream until it just holds it’s shape. If you’re using a fork, this will take about a minute or so. Dump this on top of the peanut-butter-cream mixture, but don’t stir it in quite yet.
  5. In the smaller bowl, mash the bananas until there aren’t any clumps (yuck). Drop this gooey mixture into the big bowl.
  6. Gently stir all the ingredients together until combined. Pour this (delicious) mixture onto the cookie crumb base and put it into the freezer. A few hours later (depending on your freezer), once hardened, transfer to fridge. Once cut-able, cut into serving size pieces. I usually do it all at once and put the uneaten pieces back into the fridge in a Tupperware. Enjoy!
Crumble or no crumble?

When you’re cutting up and serving the pieces, pieces of the base will probably come away. I put these pieces on Luke’s piece as a nice little topping.


* This recipe requires you to whip a lot of things separately. In order to save myself from having a mound of dishes, I will usually just use the same bowl for each ‘in a separate bowl’. As long as you scrape it all out (which you would do anyway), its just much easier. The original recipe calls for each element to be whipped before combining anything, but this works just as well and saves us all doing unnecessary dishes!

Source: Modified from Barney Desmazery’s recipe.

London

We had an amazing time in London. We saw everything we wanted to see! All the touristy stops, all the museums, as well as doing a mini self-lead Notting Hill tour. My favourite bit was definitely Portobello Road Market. My cousin and I both got the cutest dresses (for only £15!) and an adorable satchel bag each from the Appletree Boutique. There was so much to see along that road, with vendors of every kind – vintage cameras and knick-knacks, clothes, artwork, jewellery, bakeries, cafes, pubs, and boutiques. We got a cupcake each from the Hummingbird Bakery (I got Black Bottom and Luke got Red Velvet), and saw this hilarious elderly lady breaking it down on the street. Check out our photos to see what we got up to!

Buttons

BUTTONS!

Not to worry cat lovers, Luke is not pulling his tail! Simply good timing at the end of a pet.

Meet Buttons, our neighbourhood cat. We love Buttons. Buttons loves us (we think).

It’s this amazing situation that we’ve never had before. We usually go to my aunt’s in the evenings to watch a movie or play games, and nearly every time we leave (unless it’s raining, of course), Buttons comes out to walk us home. Now, his name may not actually be Buttons, but that is what we have named him, since he is just as cute as one. At the very tip of his tail (nicely covered by Luke’s hand) is a white tip, making him easily distinguishable from the other neighbourhood cats (which, believe it or not, there are a lot of).

Every night he comes out, he’ll walk us half way home. He has his boundaries, though, he isn’t going to be taken just anywhere! He stops at the T at the end of my aunt’s street, and refuses to cross. We love having his company, and he constantly wants to be pet and rubs up against your legs. A couple of times, he nearly had me face plant on the sidewalk, but then he just looks at you and all is forgiven.

He is the friendliest cat in the neighbourhood. There’s Philip, a white and brown cat who hates everyone and everything and just sits and watches the world on the wall of the building of flats across the street. There’s Snuggles, another white a brown cat who just absolutely loves to be snuggled. The second you stop petting him, he meows at you until you resume. Finally, there’s Mittens, a cat that we’ve only seen once. We coerced him out of the hedge, until he was comfortable enough for petting, until Luke’s thermos fell out of the pocket in his bag and scared the crap out of the poor cat. He stayed away from us after that.

We’ve also made friends with a squirrel (Sammy) and a magpie (Marvin), who are BFFs. We’ve seen a fox (Felix), and had quite the adventure trying to take a picture of him (let’s just say that flash works against windows).

We just love the neighbourhood animals – it’s like seeing friends everywhere you go!

St. Andrews

We took a day trip up to St. Andrews last Sunday. I was, again, in charge of map reading, but I actually made it work! It was an absolutely beautiful day out, and we had a great time. The first thing we did when we arrived was go to this little cafe on Bell Street, off South Street. This quaint little cafe, called Gorgeous, was consistently busy, and we went on an off-season day. I couldn’t even imagine it in the summer. We ate our scones upstairs, and I got the ‘Prince of Cambridge’ scone; white chocolate, raspberry and blueberry, with strawberry jam and butter. We all got pots of tea, that came covered in these knit little tea-cosies and it was just so nice.

The Prince of Cambridge Scone

The Prince of Cambridge Scone

Luke's plain scone with clotted cream and strawberry jam.

Luke’s plain scone with clotted cream and raspberry jam.

The little room up the stairs where we had our tea was a lovely little sunshine yellow hideaway. All over the walls were vintage items, like old-fashioned football cleats, old-fashioned ceramic hot water bottles, and a drying rack (complete with old-fashioned trousers and tops!) hanging from the ceiling (apparently called a Sheila Maid).

Once we had our tea and scones, we set off to explore the town. We walked down South Street towards the waterline, and stopped off at the St. Andrews Cathedral. This beautiful old ruin has a ton of interesting things to see, from old deteriorated stone staircases, to ancient human tombs. Once we explored (and once we accidentally traipsed into a ‘no entry’ entry, we set off to the waterside, and to look at the Castle. The Castle cost admission, so we just looked at it from the outside. We saw a couple of people our age running around inside the castle wearing these long red capes. As it turns out, they were students at the university, and this is their (famous) way of dressing, little did we know. We continued our walk along the seaside, investigating the ancient ruins of the baths in which the inhabitants of the castle used to bathe, and continued down towards the beach. We couldn't have had a more beautiful day.

We couldn’t have had a more beautiful day.

We took this picture just outside the beach, by the golf course. About 20 feet to the right is the public washrooms, in which Luke went without paying the 30p fee. The patient lady at the little window just watched him saunter pass, completely unaware of any wrongdoing. Who’s idea was it to have to pay to use the bathroom!? Needless to say, it was not something we’ve done in the past. So, after my aunt paid the woman for Luke, we set off towards the beach.

The beach at St. Andrews.

The beach at St. Andrews.

After we filled our shoes with sand, and imagined how lovely it would be to go to school this close to a beach (I mean honestly), we set off to the golf course.

The old St. Andrews Clubhouse.

The old St. Andrews Clubhouse.

We couldn’t pass up the photo opportunity, so we stood in the middle of the golf course to take some lovely pictures. By this point though, my feet and legs were not having any of it, and protested to go sit down somewhere, anywhere. This is largely attributed to my choice of shoes for the day; let’s just say that Keds are obviously not long-term walking material. On the way back to the car, we stopped off at the St. Andrews museum and saw the exhibit on x-ray crystallography (which was awesome). 

On the way home, we stopped at the Anstruther Fish Bar. This place was absolutely packed. There were 2 lines in the door, one for sit-in and one for take out. I have never seen such a small place full with so many people. And it wasn’t even a meal time – it was 4 o’clock! It was absolutely delicious, and Luke and I got alcoholic beverages on the side, and I got mint chocolate chip ice cream afterwards (I just can’t resist!).

I just couldn't wait to start eating for the photo to be taken...hence my half-eaten fish...

I just couldn’t wait to start eating for the photo to be taken…hence my half-eaten fish…

After we’d finished eating, we went to pick up my cousin from her dad’s and then set off for home. Luke and I fell asleep nearly immediately, and slept the whole way home. We will definitely be returning!


Paperwork

Leaving Important Information at Home

Leaving behind the most important information is absolutely essential for travelling smart. What happens if you get to your destination, and realize you’ve left your folder on the plane? What happens if you end up under a bus, and you have all your account and contact information lodged in your (not so) pretty little head? Disaster, that’s what.

But have no fear! You can avoid these blunders by simply leaving a copy behind with someone you trust. It’s almost too simple, really. And if you’re trying to figure out what to put in your little Emergency Information Pack for your designated Secret Information Holder Extraordinaire, err on the side of extra. It’s better to include things that they probably won’t need, and have them need them, than to include not enough and be screwed. Following? Good.

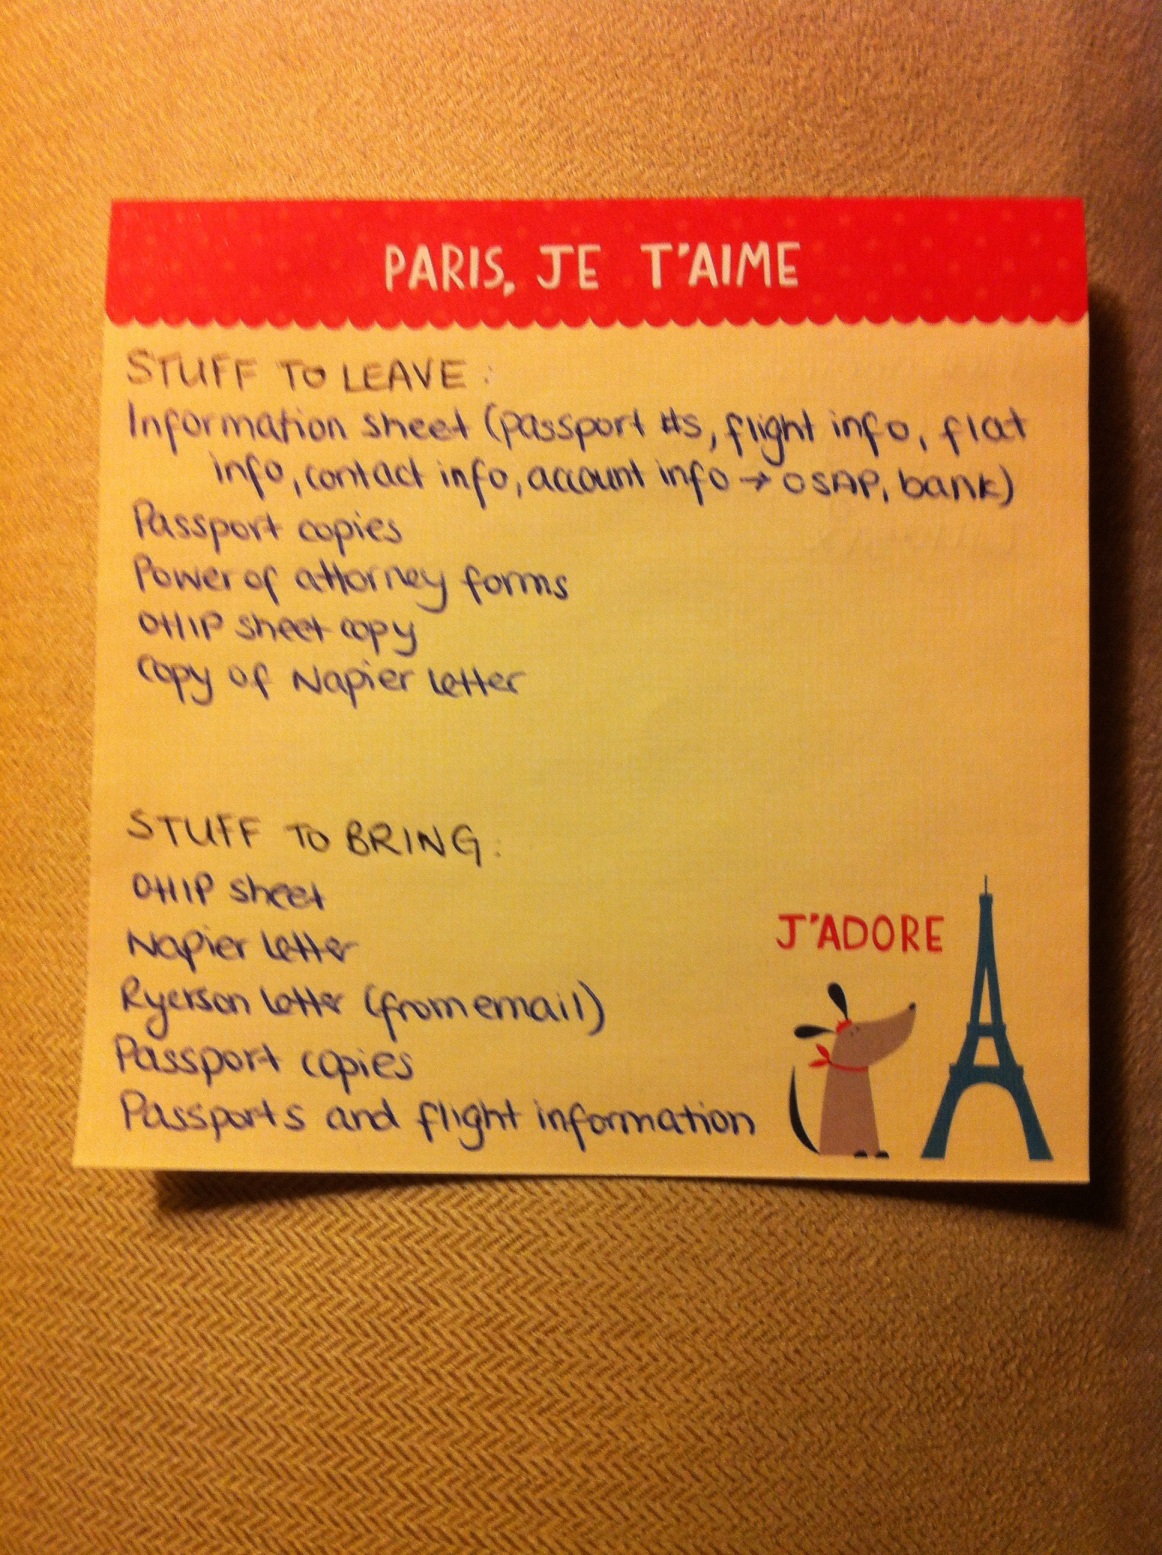
So, what to include, you may ask? Here are the things that I included. Depending on your circumstances, you may have additional things that you should leave. Also, depending on your length of trip, you may have to make other arrangements.

20140319-141851.jpg

 Your Plan

This is super important, for a couple of reasons. First, your friends and family will probably want to know where you are (for obvious reasons). Knowing that you are somewhere in the general western region of continental Europe probably isn’t good enough for them. Just sayin’. The other reason why you should leave this behind is so they can track your progress. If you say that you will be arriving in London on April 6th, according to your flight information, they can check online to see the status of your plane, and to see if you are stranded in some God-Knows-Where airport with no way to contact anyone. Better safe than sorry.

Copies of Your Passport/Healthcard

Losing your passport while abroad would be the absolute worst. But, just in case that happens, you should not only carry notarized copies of your passport(s), but you should also leave notarized copies behind in your package. This way, there are 2 sets of proof that you are, in fact, who you say you are, and can help you down the line.

Banking Information

Your bank account could be filled to the brim with earnings…or it could be coated in cobwebs. Either way, you need to leave copies of your important banking information. What happens if you end up under a bus? Or eaten by the lions you so want to see in Africa? What about all that beautiful money in your bank account? Someone might need to access it. On a less dire note, what if you simply get stranded somewhere with no more money? I know that I cannot access my online banking outside of Canada, so I need my mum to do any transfers that I may need.

Power of Attorney Forms

This is just one of those things. If you have it, you probably won’t need to us it. But, if you don’t get it, you will probably need it. Lovely the way the world works isn’t it? So…just get it. Yeah, yeah, it’s one more thing to do, you’re so excited to be going abroad, the last thing you want to do is spend time in your attorney’s office, but it’s 20 minutes well spent. And hey, your school may have an on campus attorney to do this for you at no charge (mine did!). These pieces of paper essentially allow you to allow another individual (usually your parent or spouse) to make decisions on your behalf. The things that they are allowed to do are often present in a list, so that it is clear what their rights are. Otherwise, nobody has the right to act on your behalf in a legal manner (unless you have extraneous special circumstances, of course). This can be important for things such as medical decisions, and allows people to make personal welfare decisions on your behalf. Therefore, it is absolutely essential that you only appoint someone who you believe will make the decisions as you would like them to be made, and someone who will not abuse the right. That is why people usually appoint their parent(s), as you know that they 100% have your back.

Contact Information

This is so simple, yet something so many people forget. Usually, you will be in contact with the people back home on a semi-regular basis; telling them about your adventures, asking for more money…such things. However, some people are better at staying organized than others…meaning that I am willing to bet that some people will in fact lose your new address, your new phone number, your postal code, etc. It’s just nice to write it down for them in a safe place.

In Case of Emergency Information

Most people would like to know who to contact should you be in a bad situation (duh). Having an emergency contact at your destination (for me, it’s my aunt) who your friends and family at home can contact should they feel that you have come into dire harm and are not responding to their messages. This can be difficult if you are travelling around, but try your best. You can include the contact information for the places that you will be staying, and/or people you will be travelling/staying with. You should also include your health/travel insurance information.

Email Information

I do this, simply out of my own paranoia. I left my mum with my email information (username and password), simply as a means of covering all my bases. Should I fall off the grid, she can check to see if I’m still alive.

Pet Care Details

Luke and I have a lovely little hedgehog, Charlie. We opted to leave him with Luke’s good friend Noel and his family. This was an awesome decision, as they love having him, and he is having a ball (pun intended…get it? Cause he balls up?). Anywho, we left Noel’s contact information with my mum (and vice versa) so that my mum can check up on him, and should anything bad happen (please God, no) then Noel can contact my mum to seek immediate help.

I’m sure that I’ve left things out of this list, but if I think of anything more, I will return!

Things to Bring

You should essentially bring many of the important things that you are leaving copies of behind. It is, however, not advisable to bring all your banking information (just in case you lose it).

Visa/Passport

As Luke and I are UK citizens, we didn’t need a visa to go to school here. That being said, I know that most students are not so lucky, and therefore require a visa. Not only do you need to bring a visa to the airport, you will probably also need to bring:

  • Proof that you are going where you are going, for the reason you are going (confirmation letters from your home and host universities are essential)
  • Proof that you have enough money to support yourself for your designated trip (bank statements, etc.) as you probably won’t be eligible to work
  • Any specialized information that is pertinent to your specific circumstances

You should also bring notarized copies of your passport(s), just in case you lose your passport. This is really the only way to prove that you are who you say you are, and to get where you need to be.

Copies of Your Prescriptions

Most people have prescriptions that they need to take. If you are bringing a large quantity of prescription drugs abroad, you really should bring copies of the prescriptions with you, in order to prove that they are for you and are not for illegal uses. Also, you should always carry your prescriptions in their original packaging with your name clearly labelled.

Your Actual Prescriptions

Don’t forget them! It’s really hard to get them abroad.

Your Insurance Information

My insurance company gives me a handy dandy little card for my health and travel insurance. On the back of my card is all the information I need should I need to file a claim: the account number, the contact number (for home and abroad), and a brief description of the process of calling. Usually they require you to call before you seek medical attention, unless, of course, it is an emergency situation.

I must stress that you should only leave this information with someone you trust completely. You do not want to leave any sensitive information in the wrong hands. Also, I posted this merely as a guideline, and your circumstances may warrant additions or exclusions from this list. This is merely what chose to leave behind with my mum, as per the recommendation of my attorney. ALSO: It is hugely important that this information be kept in a very safe place.

College: The Do Over

I’m just about rounding out my 3rd year of University. Luke’s finishing his 4th and final. And reading this article has brought to light many of the things that I think about my university experience.

I’m going to start out by saying that I lived at home during university. I lived a 30 minute bus, a 45 minute train, and a 30 minute walk from campus. Needless to say, I spend a lot of time traveling. I love a lot of things about living at home: it’s free (I’m a saver!), I don’t have to worry about bills or grocery shopping, and I can focus on my schoolwork without distractions from other people.

With that being said, I feel like I missed out on a lot. I never went to the bar, never went clubbing, I never lived downtown, and I spent like 3 hours a day traveling, meaning that I really don’t want to stick around after my class that finishes at 6.

I know that some people live at home and still do these things. I guess I just have different priorities. I work 2 jobs, meaning I work every weekend, all weekend, as well as a few evenings a week. I have 15-20 hours of class a week (and I go to every one) not to mention assignments and group projects (which, unfortunately, my program favors). And I need to make time to spend with my family and friends.

So yeah, sometimes I wish I could’ve had a College Do Over. There are definitely things I would’ve changed. I would’ve come from a wealthy family, allowing me to live downtown on campus (at $1000 a month) and not need to work. But then, I wouldn’t have saved as much as I have, allowing me to move to another country. I would’ve spent all my time with my friends, but I would’ve lost my scholarship and Deans List accreditation. So really, in the end, there’s not much I could’ve changed.

It’s one of those things that you see in the movies; “the college experience”. I would say that I had a very different experience, but I love it all the same. I value hardwork, and yeah, would I like it sometimes if I could just switch off and act like everyone else? I’ve had my moments. But at the end of the day, I like having a busy, hardworking life. Because, 10 years down the line, I can look back on my university years and see that I’ve made a few really good friends, learned a lot about responsibility, and am prepared for my life running my own business.

This post outlines a lot of really great tips that I have followed throughout my university career. But I just have to add one thing: do exactly what you want to do, and not just what everyone else is doing. Everybody’s university experience is different, but as long as you do exactly what works for you, you’ll look back and have no regrets.

My university experience may not be picture perfect, but it’s made me who I am, and I have to say, I like me.

My Traveling Style

20140319-141244.jpg

I’m a planner. Always have been, always will be. I make lists, plans, charts, and organize everything to an (almost) OCD level. It’s how I keep my brain sorted, and how I make sure that I get everything done.

I’m no different when I plan for traveling. I have a journal in which I write all my travel details, a ‘Travel To Do List’ on the fridge, and print all my booking confirmations, boarding passes, maps, and receipts, keeping them sorted in my ‘travel’ folder. I always highlight the important details on these (often crowded) pages, such as check-in times, confirmation numbers, and any requirements we must fulfill before checking in (ie. confirm your booking 24 hours ahead of time). Also, just because I love it, I make calendars to map out my travel months (as well as putting it in my planner), and color code everything. Everything. My highlighters and colored pens are by best friends. Yes, I am indeed a loser. But I love being organized more than I really give a shit.

I also do my best to look up the top places we’d like to go, in our various destinations. For example, we’re going to London in a few weekends, and have made a plan for our days. There are a million and a half things to do in London, so we plan out each day to make the most of our time there. In order to make our time there as simple as possible (and to leave as much time as possible for actually doing fun stuff, we book as much as humanly possible online ahead of time. Things like admission tickets, train and bus tickets, and registering for events can often be done ahead of time, at a usually discounted price. In order to decide what we want to do, we look at a ton of reviews online. But, more important than reviews (everyone has a different opinion!) is the idea that we need to do what we really want to do. We just think to ourselves, “where are the places that we would regret not going?” There are so many options we have in this world, that you need to pick what is right for you. I, personally, love museums and history, so I could spend days and days inside these amazing places, while others may love tasting as many foods as they can, or going to the major touristy attractions. But, one thing that I always try to do (which can be hard, when you’ve planned everything so meticulously) is to go off book. Did I really just say that? If your plan for the day was to go to Destination A, but on the way, you spot a lovely little farmers market, unlike anything you have at home, don’t be afraid to stop. Check it out. Sometimes off book can give you the best memories.


A couple days before I leave, I check that I didn’t miss any confirmations or check-ins, then I make my packing lists. I make one to check off when leaving, and one to bring with me to make sure I haven’t left anything behind. There’s one of my secrets, by the way, lists. I have about 200 lists. Lists for stuff to pack, places to go, expenses paid and outstanding, and things to bring back.

So that’s my pre-travel planning routine. When I travel, I bring my handy dandy ‘travel’ folder (this year it’s hot pink!) whenever we go on our way. There is absolutely nothing worse than showing up somewhere and realizing you left your confirmation at home. Then, while we’re away (having an awesome time) I take as many pictures as possible. I take pictures of signs, of people, of places, of things I’ve never seen before. I take pictures of our food, of our favourite restaurants and cafés, and of our daily adventures. Along with my pictures, I collect things. Business cards, menus, tickets, booking slips, and anything else that was important to our time away. Then, when we get back home, I make pages in our travel journal and paste all these things in. There’s nothing nicer than looking back, years down the line, and seeing the original plane tickets you used for your adventures, and knowing how to find that one cafe that you both loved in Paris.

Planning for travel can be daunting. You have to book accommodation (and read a million reviews to find the perfect place), book flights, book transfers from airports into city centers, figure out how you’re going to get around once you get there, and plan your attractions. I conquer this daunting task by being as organized as possible and having it all planned out. So when there’s a bump in your travels, you see it as an adventure.

RECIPE: Macaroni and Cheese

I love ketchup on my macaroni and cheese. Who doesn't!?

I love ketchup on my macaroni and cheese. Who doesn’t!?

This recipe for macaroni and cheese is unlike any other I’ve ever tried. It is delicious, and it just the right amount of cheesy. We found this delicious aged Welsh cheddar on sale at Marks & Spencer, but unfortunately it was only a promotional product, so we’ve had to go back to regular cheddar. If you can use an aged cheese, you will not be disappointed. But have no fear, it is still absolutely delectable with regular cheddar.

Ingredients:

  • 8 oz macaroni
  • 4 Tbsp butter
  • 4 Tbsp flour
  • 2 cups milk
  • 1/2 tsp salt
  • Pepper, to taste
  • 2 cups cheddar cheese, shredded

Method:

Cook and drain your macaroni as per package directions, then set aside.

In a large saucepan, melt your butter. In a separate bowl, combine the salt and pepper with the flour. Slowly add dry mixture into butter and whisk constantly (making a rue) until blended.

Pour milk in gradually, stirring constantly. Stir until well incorporated.

Bring to a boil and let boil for 2 minutes, stirring constantly.

Reduce heat and cook for an additional 10 minutes. The sauce should thicken, but you need to keep stirring! Switch hands if you want to avoid the Popeye look.

Add shredded cheese little by little and simmer until the cheese melts.

Pour sauce over macaroni and stir together until coated.

Optional: Bake your macaroni and cheese in a 400°F oven, for about 20 to 30 minutes to crispen up the top layer of cheese. You can also grate additional cheese on top to make a crust of cheesy goodness.

Source: We found this recipe on Food.com a few weeks ago and have never looked back. I opt not to bake it, as I am usually too impatient.